Today we are going to show you how to properly assemble our Feliluke freestanding package delivery box. In order to ship the Box safely to you, it is necessary for it to arrive disassembled, but don’t worry, assembly is easy with the provided instructions and this video. So let us show you how it’s done.

Ⅰ. In the Packaging
List of Panels
- 01: Left side panel (1008*382*35mm)
- 02: Right side panel (1008*382*35mm)
- 03: Back Panel (1008*455*12mm)
- 04: Front frame ( comes with 07, 08 and 11 insterted- take them out for assembly)
- 05: Top Panel (458*385*20mm)
- 06: Base Panel with 4 large holes (455*345*20mm)
- 07: Front Access Door (496*410*20mm)
- 08: Parcel Flap (stainless steel) 410*350*20mm
- 09: Inner Flap (385*250*20mm)
- 10: Parcel Guide
- 12: Rods (2)
- 13: Foam Floor (for soft landing) 350*400*25mm

*Please take care when handling and assembling this product as sharp edges may cause injury.
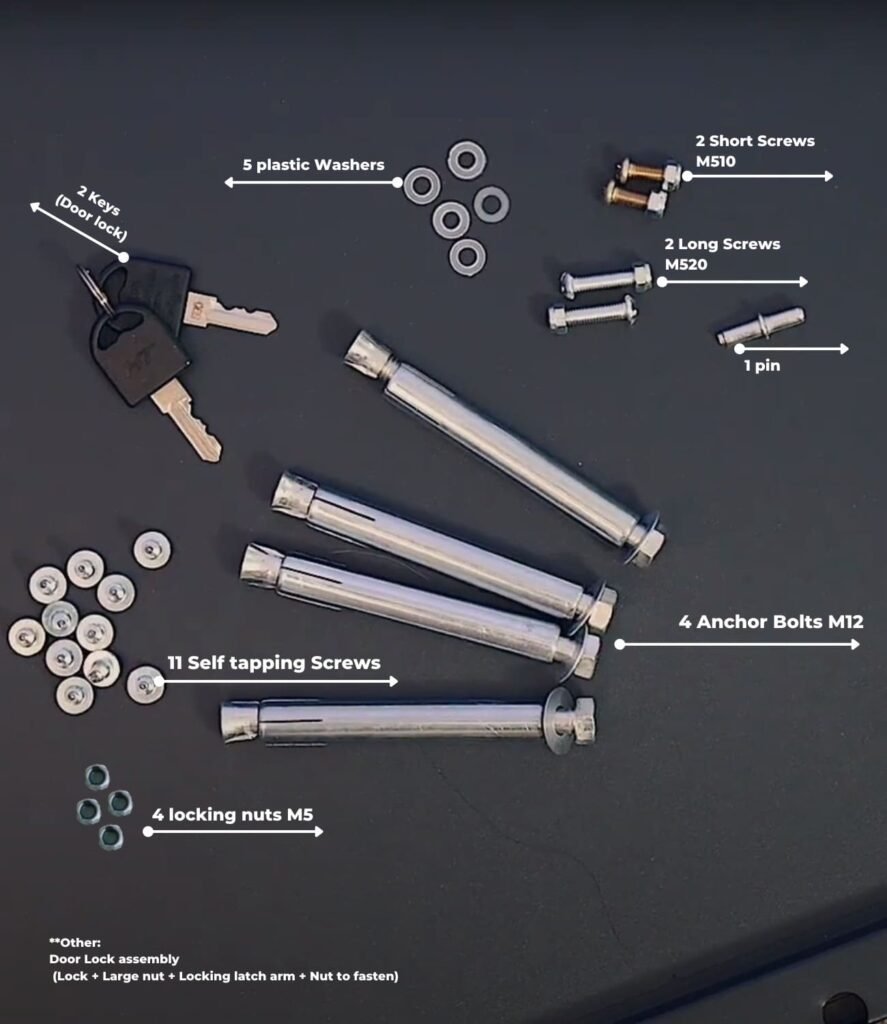
Other Parts
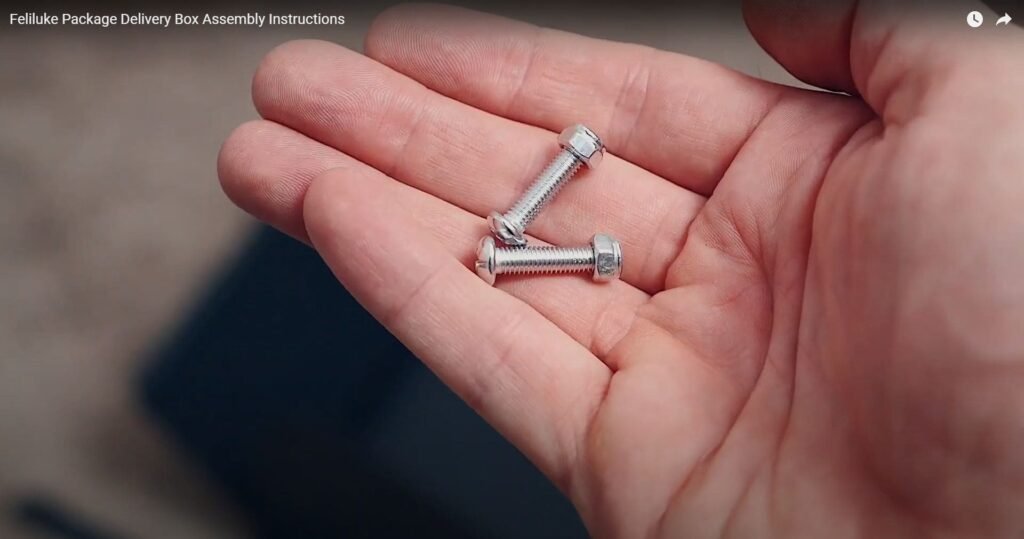
- 2 Short Screws M510
- 2 Long Screws M520
- 4 Locking Nuts M5
- 5 plastic Washers
- 1 Pin
- 14 Self tapping Screws
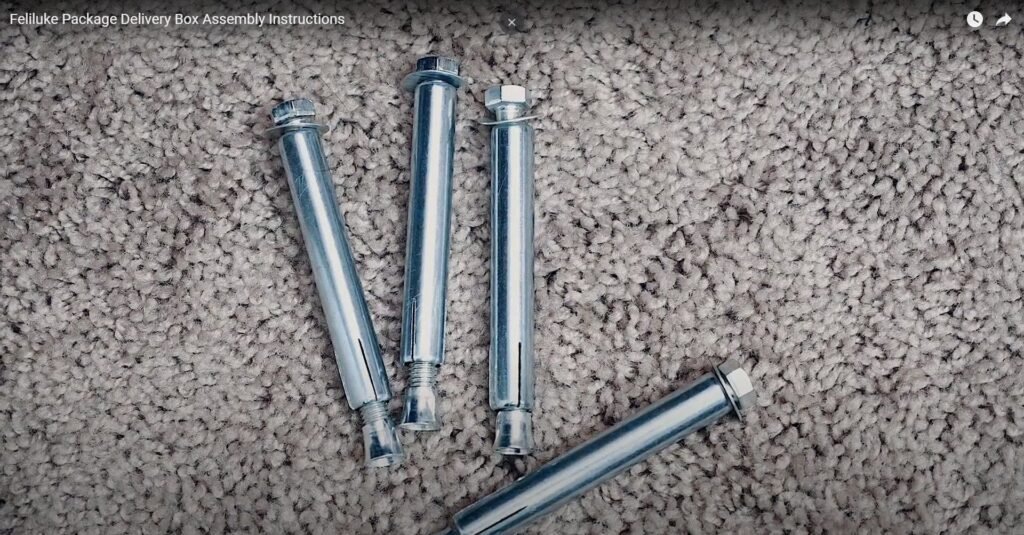
- 4 Anchor Bolts
- Door Lock assembly (Lock + Large nut + Locking latch arm + Nut to fasten)
- 2 Keys (Door lock)
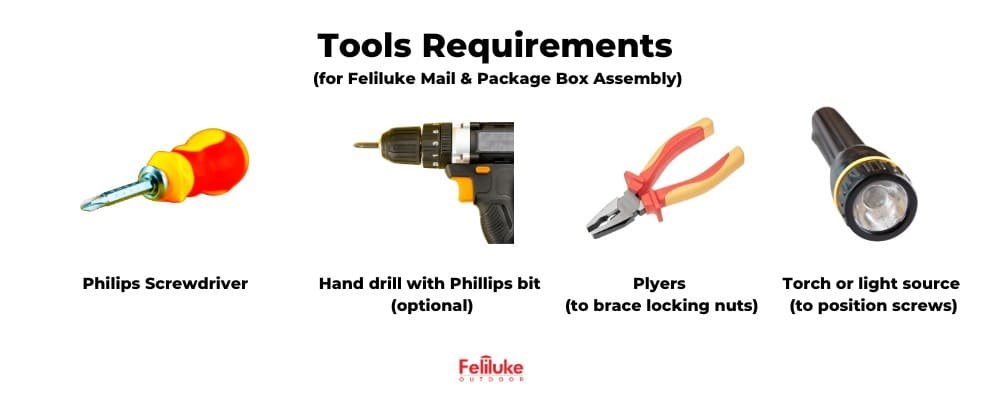
Ⅱ.Tools Requirements
- Screwdriver
- Hand drill with Phillips bit (optional)
- Plyers (to brace locking nuts)
- Torch or light source (to position screws)
Ⅲ. Recommendations
We highly recommend wearing gloves during the assembly process to protect hands from sharp edges. The brushed steel finish on the doors and flaps may appear to have some marks which can be easily polished off at the end of the assembly process. If there are fine scratches on the Parcel or Letter stainless steel flaps use fine sandpaper with the grain of the stainless steel to remove. The manufacturing process leaves some small tool marks which are unavoidable.

Ⅳ. Tips
- Make sure you assemble the box on a soft surface such as a carpet or blanket. This will prevent the powder coat from being damaged during assembly.
- Don’t drag parts on top of each other, place separately while working on assembly.
Ⅴ. Ultimate Installation Instruction of Feliluke Mail and Package Box
Step 1: Preparation
Open the box and make sure you have all the pieces, screws and bolts included if
anything is missing or damaged, it could compromise the structural Integrity of your box. (contact us at info@feliluke.com if there is any kits missing. )
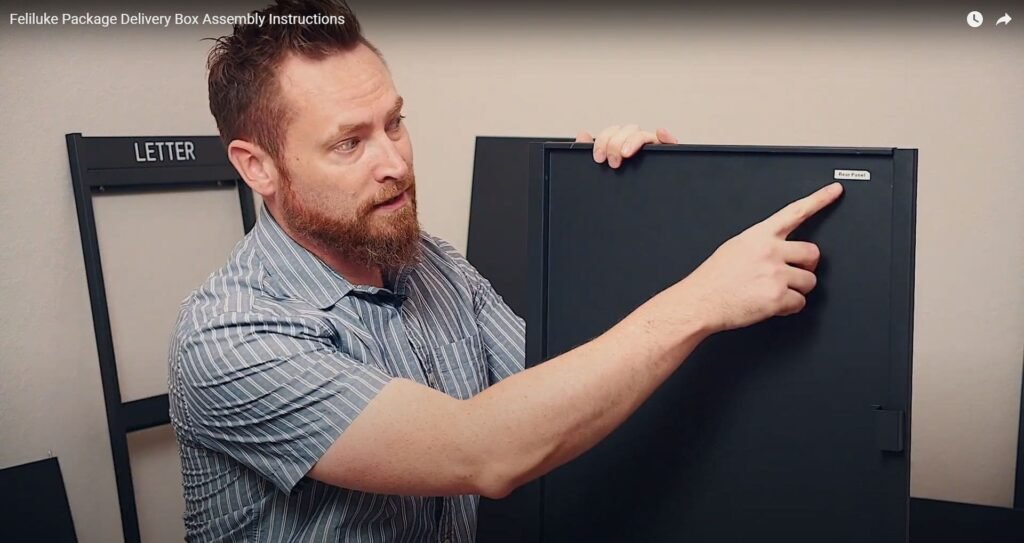
Step 2: Assemble the Sides
Locate the back panel of the delivery box. It should have a white label on it, but if not you can easily identify it by these two brackets. Lay it down flat.
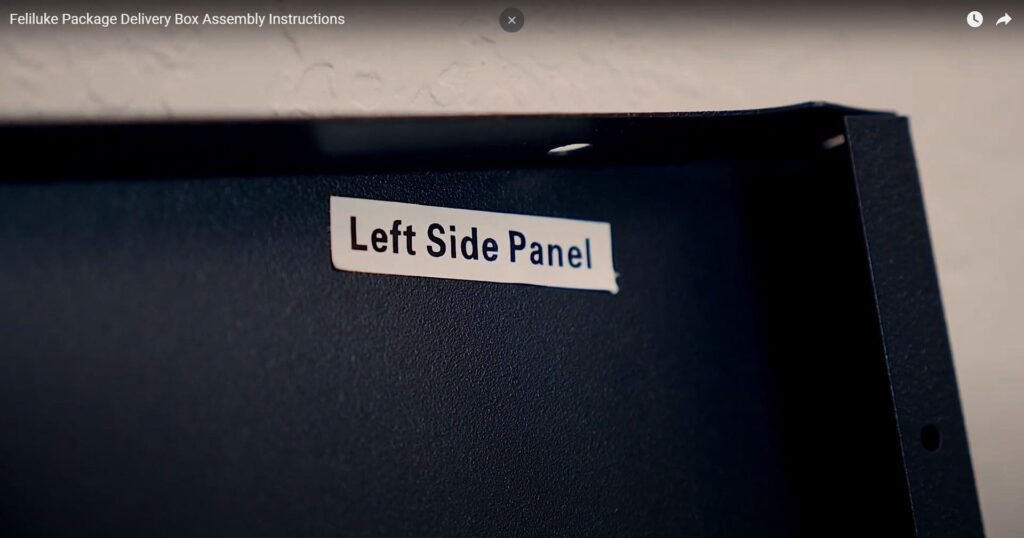
Next, locate the two side panels. Again they should be labeled, but they’re pretty easy to find because next to the back panel they’re the two largest pieces in the kit. You can identify how the panels fit by this lip that runs along one side. It hooks onto the back panel like this: secure one side panel with three of these self-tightening metal screws. Repeat this process on the other side.
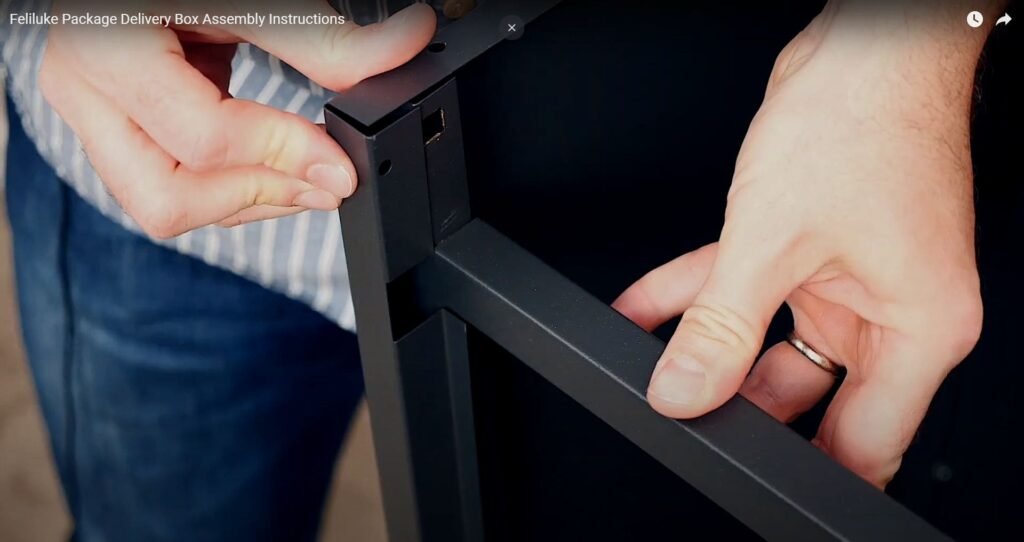
Step 3: Assemble the Front Frame
Stand the delivery box upright. chances are that for shipping convenience the letter flap and the package door were installed in the front panel before it left the warehouse. These two flaps will need to be removed in order to help the front panel slide into place. To remove them just depress the spring-loaded hinge pins on either side of the letter flap and the package door. Then your front panel should easily slide into place. The front panel does not need to be secured with any screws. Once this panel is in place you can reinstall the letter flap, but it’s best to reattach the package door later.

Step 4: Install the Top Lid
The top panel should be labeled with a sticker, but it can also be identified due to its two distinct edges. One edge has a single fold, the other Edge has a double fold. Make sure the edge with the double fold is placed towards the front of the unit. Just set the lid in place and secure it with four screws.

Step 5: Install the Bottom Panel
Lay the delivery box on its back side, the bottom panel has two little tabs on the left and right sides of the unit. These will lock into place when you slide the edges into the clips on the left and right side panels. Lastly use one screw to secure the bottom to the back panel.

Step 6: Install the Front Bracket
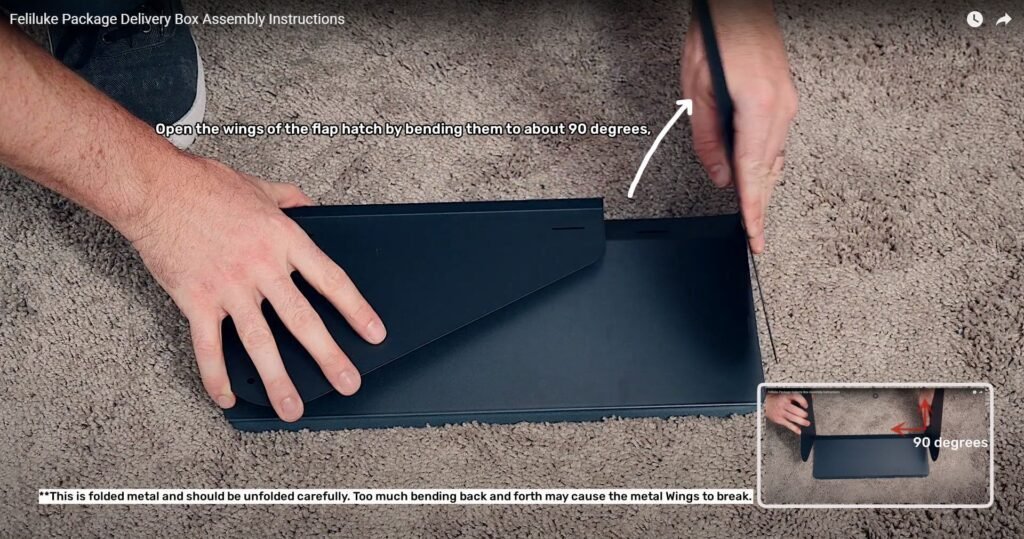
Open the wings of the flap hatch by bending them to about 90 degrees, this is folded metal and should be unfolded carefully. Too much bending back and forth may cause the metal Wings to break.
Locate the package door which you removed earlier during the front panel assembly. Set the flat patch into the package door like this: making sure the narrow end of the Wings are toward the top of the door.

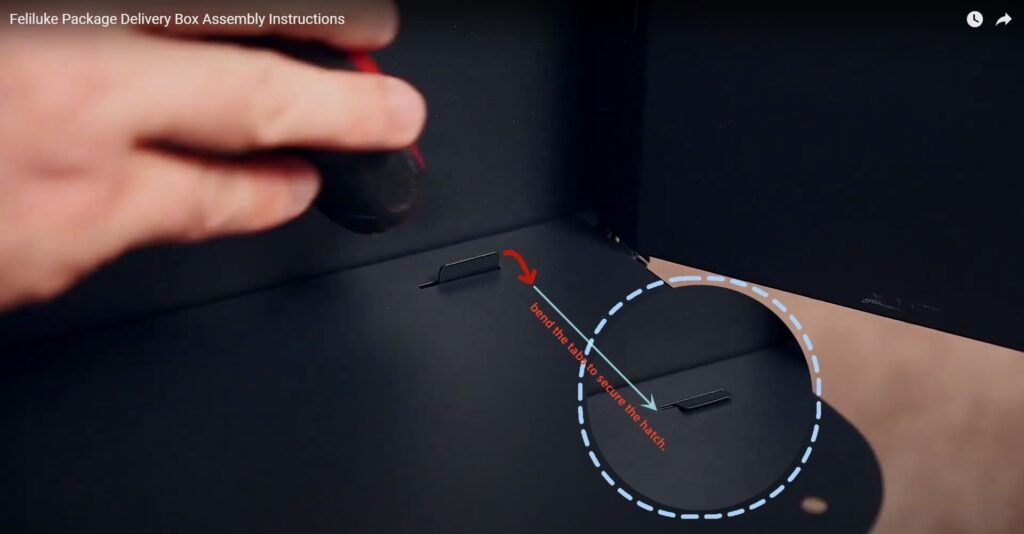
Locate the tabs on the inside edges of the package door and insert them through the slots on the hatch wings like this: Once in place bend the tabs to secure the hatch.
Locate the two metal struts and secure them to the hatch wings with the long bolt. Number M520 in your parts list. Use a lock nut to secure them in place and make sure the head of the screws face the inside of the unit.
Attach the other end of the two struts to the inside panel. The inside panel is the smallest panel in your kit and is distinguished by the two spring-loaded hinge pins on the back side.
Use the smaller bolt number M510 in your parts list to secure the struts to the inside panel.
Once the package door in the inside panel are connected via the metal struts, carefully set the assembly in place. Secure the package door as shown as well as the inside panel by snapping the hinge pins into the holes provided on the inside of the back of the unit. Make sure everything is securely in place before proceeding.
Step 7: Install the Large Package Door
The package door should be the last piece in your kit. The top of the door has this little spring-loaded hinge pin. The bottom of the door has a hole in it for this hinge pin. Begin by setting the hinge pin in the hole at the bottom of the package box, set the package door on top then depress the hinge pin to slide it into place.

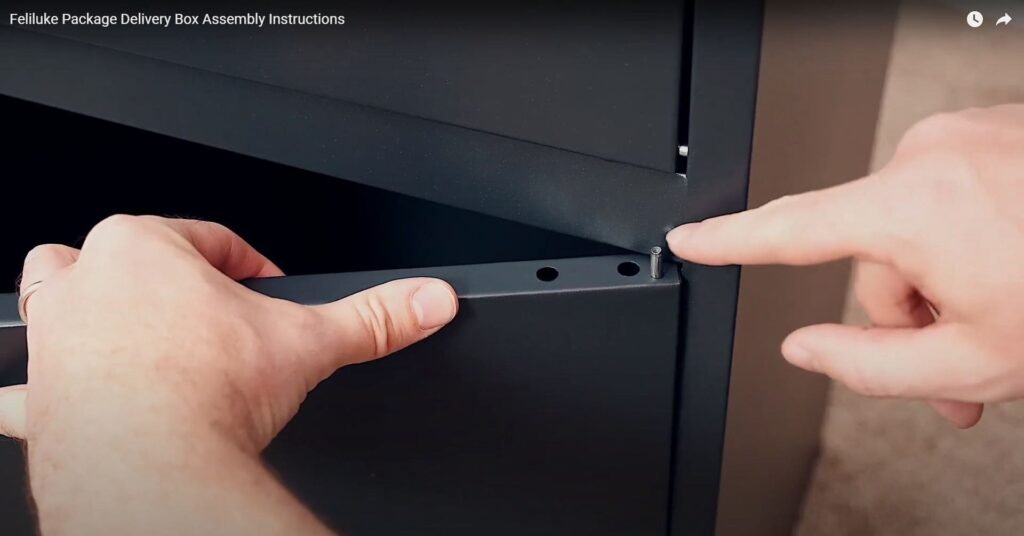
Your package delivery box is complete. the kit also comes with four extra long screw anchors to help you permanently fix the delivery box to the floor.
There are four pre-drilled holes on the bottom of the unit. When you set the anchor into the floor and put a bolt and washer through the bottom of the delivery box into the anchor as you tighten it up this nut on the bottom of the anchor is going to expand and lock it into place. These bolts can be used on just about any surface including wood Concrete and brick.


A piece of foam is also included in the packing and is recommended to be placed inside the box at the base to cushion landing of parcels.

One thing to keep in mind is that this package delivery box is not a vault, it’s not a guaranteed Safeguard against theft it is designed to impede common package thieves who see the front of your home or office as an easy target make a statement by showing that you take package theft seriously and that your delivery location is a safe place retailers and delivery drivers will thank you because as you take measures to protect your mail, you’re helping to safeguard the dependability of retailers and mail carriers everywhere.
Any questions, please email feliluke team at info@feliluke.com
HIGHLY RECOMMEND TO WATCH THE ASSEMBLY VIDEO ON:
The Ultimate Guide: Securing Your Packages with the Feliluke Parcel Drop Box (.MP4)
Ⅵ. FAQ
Q. How can I help my delivery drivers know where to deliver?
1.
Place stickers on your box: You can buy our package delivery sticker and affix it to your box as shown in the example below:
The black Feliluke delivery locker is placed at the doorstep, adorned with a delivery instruction sticker. A conversation unfolds between the delivery person and the homeowner by the locker.
2.
Provide instructions to delivery services: If you regularly receive deliveries from specific delivery services such as UPS, FedEx, or DHL, consider contacting their customer service or visiting their website to provide specific instructions about your parcel drop box. You can mention its location, any specific codes or access instructions if necessary, and request that they use the drop box for deliveries.
Q. Can someone steal my Feliluke mail & package box?
Feliluke mail & package box is a heavy and large object.
Additionally, all mail & package boxes come with an anchoring kit to secure to the ground which can help prevent it from being taken.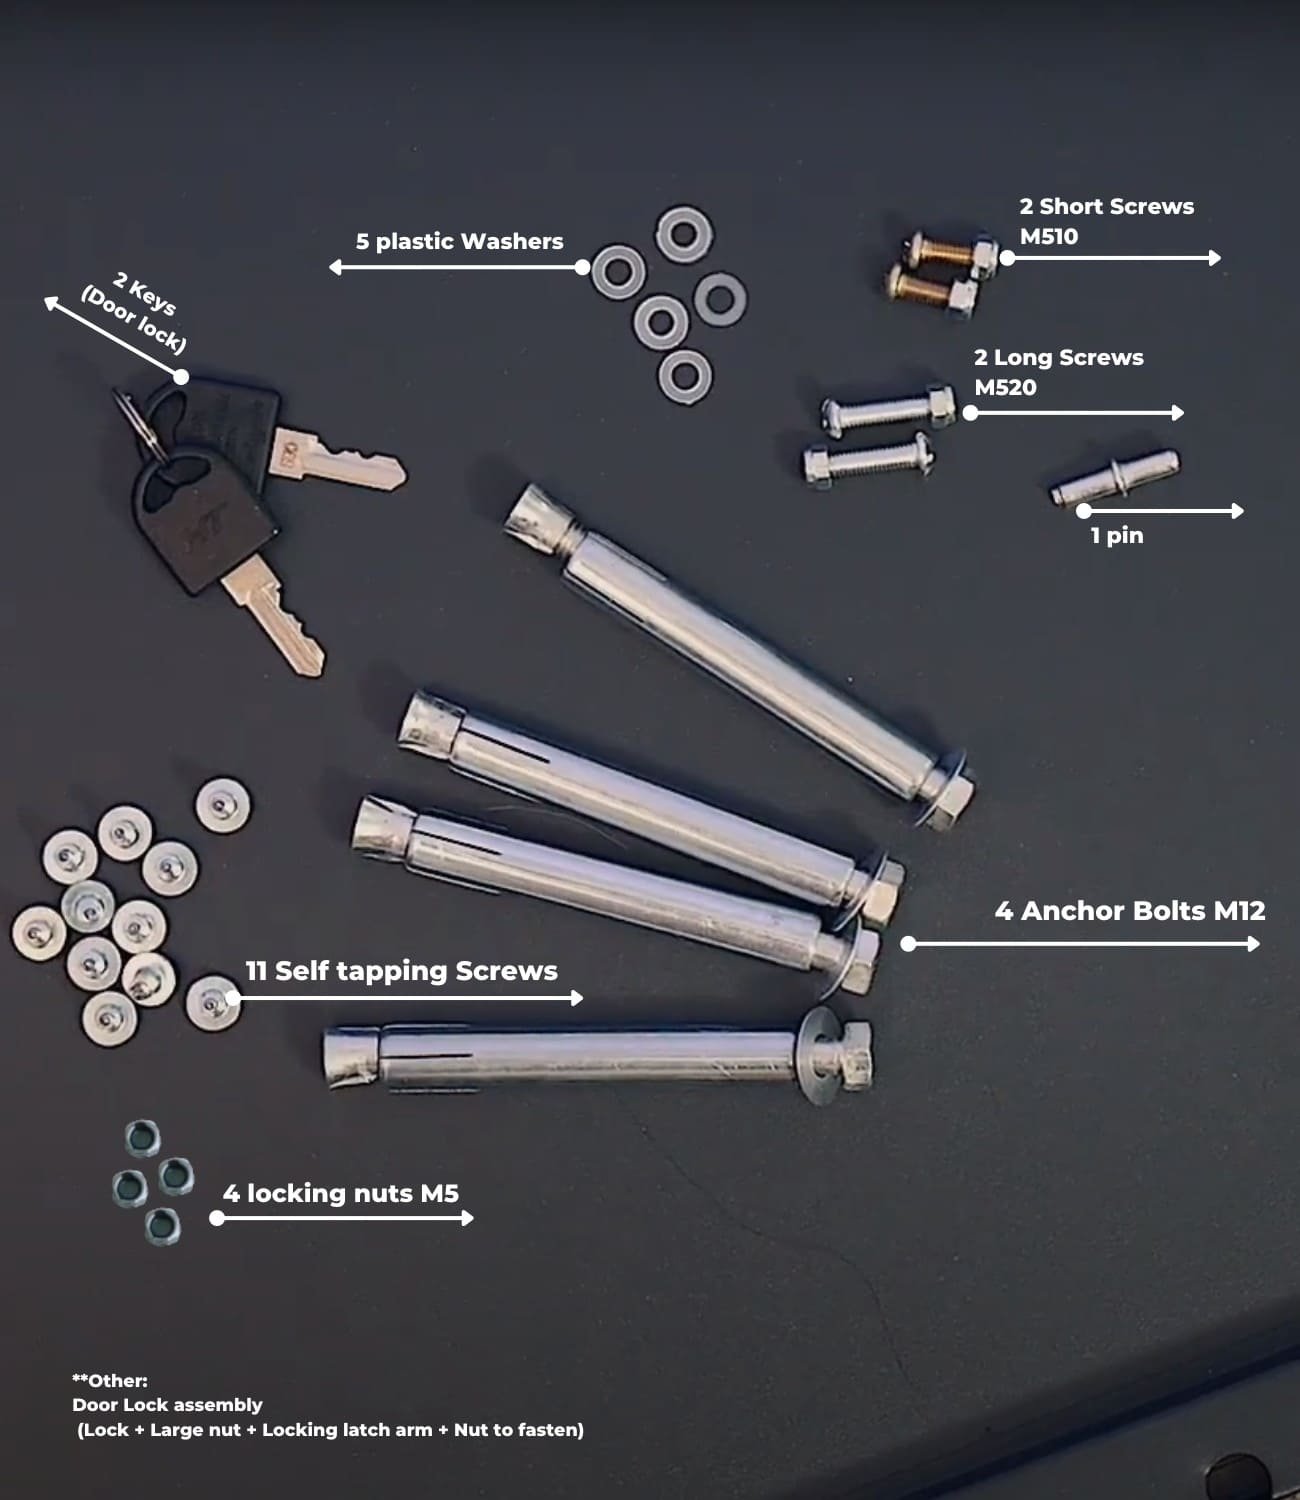
Q. Can I anchor into wood or concrete?
Yes, anchoring into wood or concrete by four bolts that are included in the package.
Q. How do I contact Feliluke Customer Support?
Questions? Let’s talk.
Chat – Use our online chat to get quick responses for questions that can’t wait.
Email – Email info@feliluke.com, and we’ll respond within 24 hours.
Talk – Call us by Whatsapp @ +86 189 1264 8555